Excel to Tally Bulk Import: 1 Lakh Entries
Learn how to import 1 lakh entries from Excel to Tally with Edocsmart using 100-record batches, track In Progress entries, and review results before retrying.
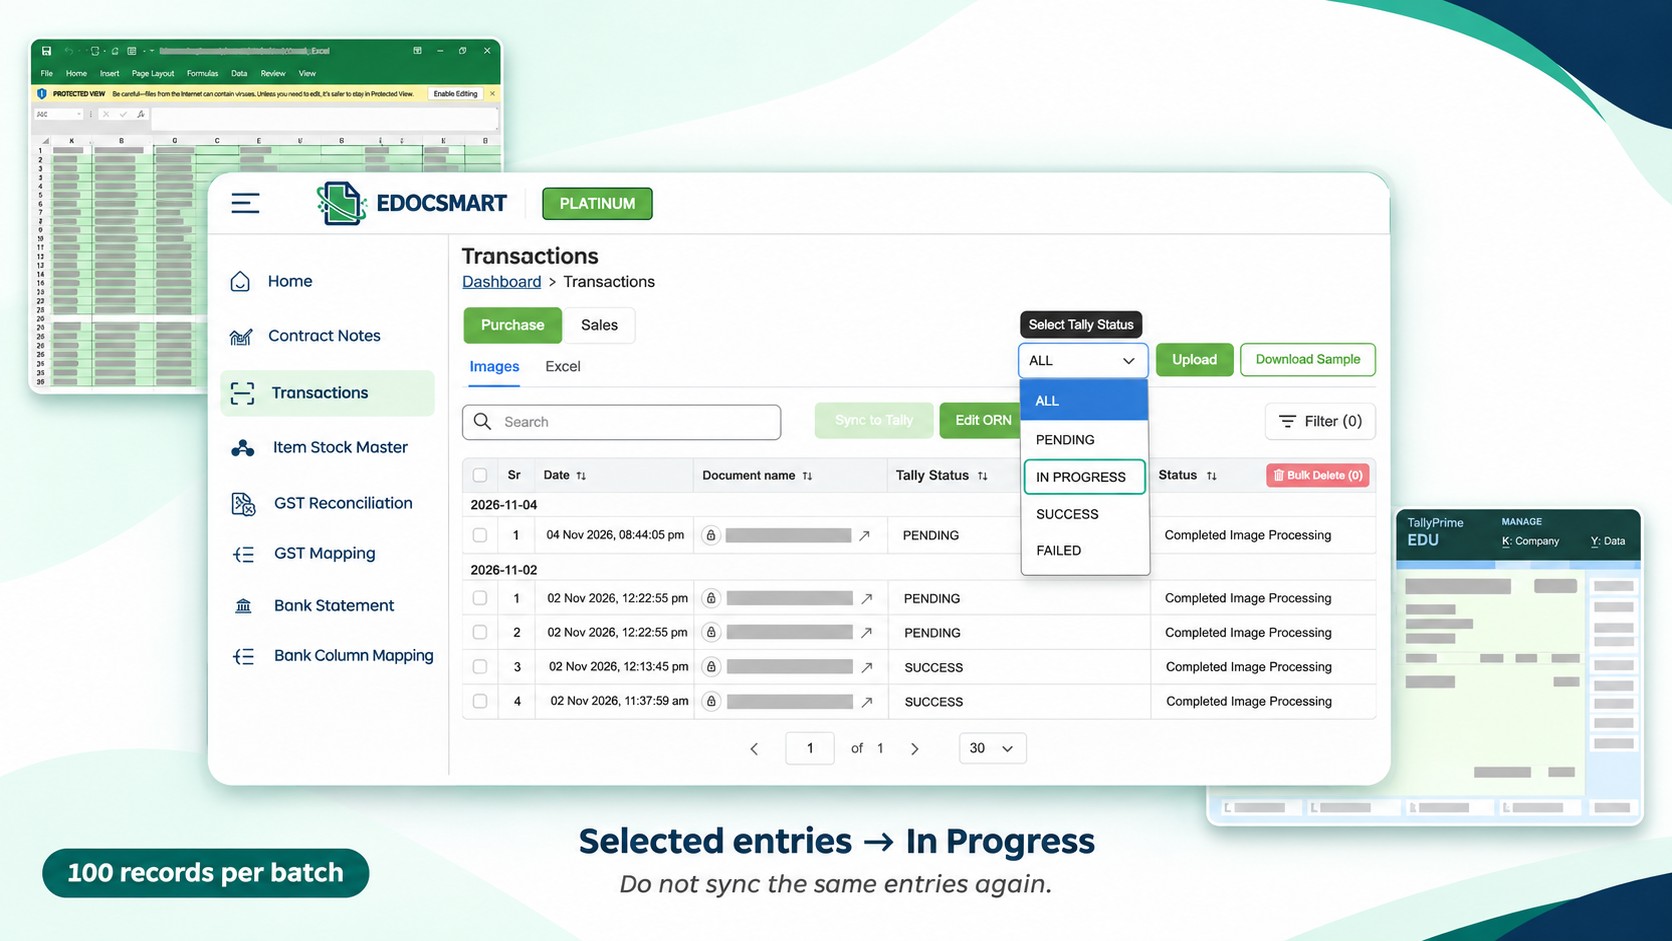
An accountant receives an Excel file containing a large volume of transactions. The information is available, but entering it into Tally manually would require repeated typing and checking. With other accounting work waiting, the challenge is to transfer the records while keeping the review manageable.
The accountant uploads the supported file to Edocsmart. Instead of reviewing the entire workload at once, the records are presented in batches of 100. This allows the accountant to check the documents, select the approved entries, and submit them to Tally.
Edocsmart can process a workload of 1 lakh entries. The purpose of the 100-record batches is to make document review and transfer easier to manage. Users can check each batch before deciding which records are ready for synchronization.
Why Edocsmart Provides Data in Batches of 100
A large dataset can be difficult to review on a single screen. Invoice references, party names, amounts, and item details still need attention, even when the file has been processed.
Edocsmart presents the prepared data in batches of 100 records so users can review a manageable group of documents at a time.
This arrangement helps users:
- Compare the prepared records with the source documents.
- Identify entries that require correction.
- Select approved records for transfer.
- Track submitted entries separately from those remaning review.
The batch size supports the review process. It does not mean that the complete workload is limited to 100 entries.
Step 1: Prepare the Excel File
Before uploading, check that the workbook contains the information required for the intended transactions.
Review invoice references, dates, parties, item details, quantities, rates, and amounts. Confirm how multiple item rows relate to the same invoice.
Keep the original workbook available for comparison. Also identify records already entered in Tally so they are not included again as new transactions.
For Excel to Tally import, understanding the source data is an essential part of preparation.
Step 2: Select the Appropriate Excel Configuration
Open Transactions, select the relevant Sales or Purchase excel, and choose the Excel tab.
Use the configuration that matches the excel:
| Excel Option | When to Use It |
|---|---|
| Default Excel | The file follows the Edocsmart sample’s expected headings and structure. Manual column mapping is not required. |
| Customized Excel | The supported file uses a different layout and requires its source columns to be mapped. |
When using Customized Excel, match the relevant workbook columns with the appropriate system fields. Check the values beneath each heading before selecting a column.
Review the applicable accounting settings before processing the records.
Step 3: Upload the File and Review the Prepared Batches
Upload the intended workbook and enter the actual Header Row Number when requested.
Once the data has been processed, review the records provided in batches of 100. Compare the prepared information with Excel and the supporting documents.
Check:
- Invoice references, dates, and party names.
- Ledger allocations.
- Item descriptions, quantities, units, and rates.
- Applicable tax information.
- Final invoice totals.
For invoices containing several items, confirm that the related rows have been prepared under the correct transaction.
Correct any differences and save the approved information through the available workflow. Processing a large file does not remove the need to review its records.
Step 4: Start the Edocsmart Tally Connector
Before transferring approved entries, keep a current company backup and open the intended company in Tally.
Start the Edocsmart Tally Connector and check its connection indicators. Confirm that Tally and the required internet connection are available.
Keep the connector running while the submitted records are being transferred.
For the initial transfer, select a small approved sample and inspect the resulting vouchers in Tally before continuing with more records.
Step 5: Select Approved Entries and Sync to Tally
Within a batch of 100 records, select the entries that have been reviewed and approved. Then click Sync to Tally.
You do not need to submit every record in the batch together. If some documents require further checking, leave them unselected while transferring the approved entries.
For example, if 80 records are approved and 20 require correction, select the approved 80 for synchronization. Review the remaining records separately before submitting them.
This keeps document review connected to the decision to transfer each entry.
Step 6: Understand the In Progress Status
After you click Sync to Tally, the selected entries show In Progress.
This status indicates that their synchronization requests have been submitted and have not yet reached a final result.
Only the entries selected for synchronization show In Progress as a result of that action.
For example:
| Records in the Batch | Selected for Sync | What Happens |
|---|---|---|
| 100 | 40 | The selected 40 entries show In Progress. |
| Remaining 60 | Not selected | They are not submitted by that sync action. |
Do not submit the same In Progress entries again. Wait for their statuses to update before taking further action.
If the connector is off, start it and check the connection so queued transfers can continue. If records remain unresolved, check their current status and the available information before retrying.
Step 7: Check the Results and Continue Reviewing
Monitor the Tally Status of the submitted records.
| Status | What to Do |
|---|---|
| Pending | Check whether the record requires review or submission. |
| In Progress | Allow the submitted request to continue and check the connector if necessary. |
| Success | Verify the resulting voucher in Tally. |
| Failed | Inspect the available reason and resolve the issue before retrying. |
Review the current batch’s results before continuing with the next group of documents.
If a transfer completes only partly, identify which entries reached Tally. Retry only the records that still require action, after confirming their current status.
For a large workload, maintain a record of reviewed batches, completed transfers, and unresolved entries. This helps keep the overall Excel to Tally process traceable.
Frequently Asked Questions
Why are the records presented in batches of 100?
The batches allow users to check a manageable group of documents, correct differences, and select approved entries before transferring them to Tally.
Do I have to sync all 100 records together?
No. You can select the reviewed entries within the batch and submit them through Sync to Tally. Records requiring further review can remain unselected.
When does an entry show In Progress?
An entry shows In Progress after it has been selected and submitted through Sync to Tally. This indicates that its synchronization request has been submitted.
Should I sync an In Progress entry again?
No. Wait for its status to update and check the connector if necessary. Repeatedly submitting the same entry can increase the risk of recreating a transaction.
Does Success mean no further checking is required?
Review the resulting vouchers in Tally and compare the relevant references, parties, allocations, and totals with the source records.
Conclusion
Importing a large volume of data requires a manageable review process. Edocsmart can process 1 lakh entries while presenting the prepared records in batches of 100, allowing users to check documents and select approved entries for transfer.
Once selected records show In Progress, allow their sync requests to continue and review the results before submitting them again.
Explore Edocsmart Excel to Tally Software to prepare, review, and transfer supported Excel records to Tally.