How to Import Invoice into BUSY
Learn how to import invoice data into BUSY accounting software using Edocsmart, from invoice scanning and data verification to Excel export and accounting entry.
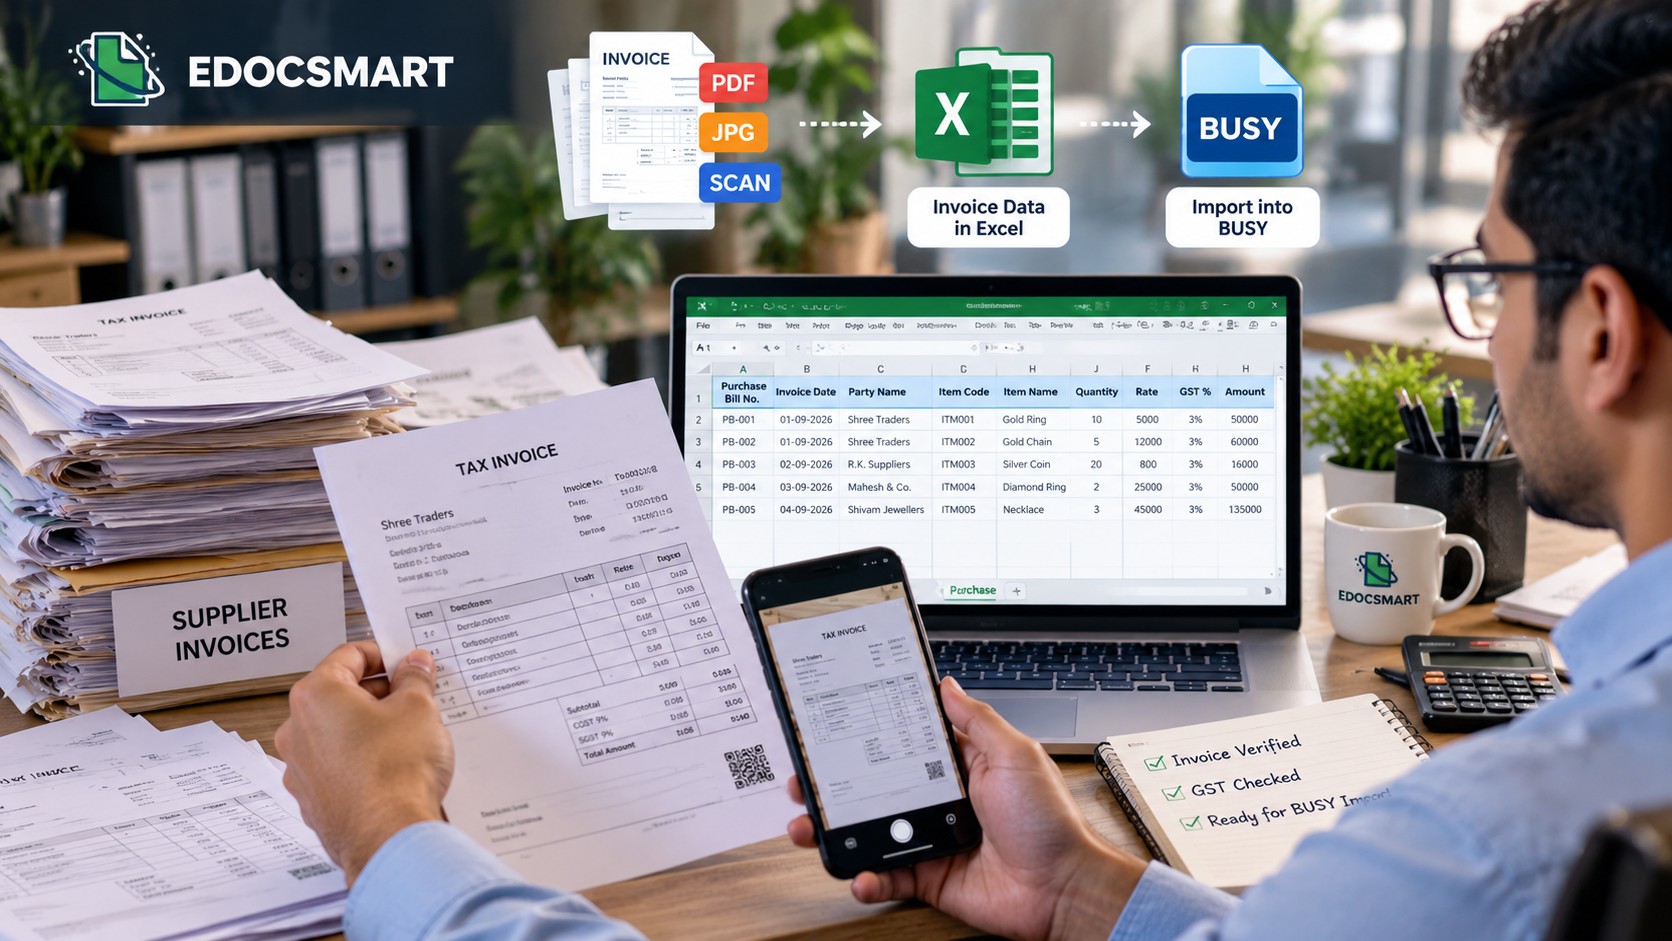
When Every Invoice Becomes Another Accounting Task
Imagine running a growing wholesale business. Every morning, your desk fills with invoices from different suppliers. Some arrive as printed bills, others as PDF attachments, and a few come as photographs shared over WhatsApp.
Meanwhile, your sales team is generating new invoices throughout the day.
Your accountant has to check supplier names, invoice numbers, dates, item codes, quantities, rates, GST amounts and final totals before entering the information into BUSY accounting software.
The real challenge is not handling one invoice. It is repeating the same work for dozens of invoices every day.
A single typing mistake in an item quantity or GST amount can create additional reconciliation work. And when invoice volumes increase, manual entry takes time away from other important accounting activities.
This is where an automated invoice-processing workflow can help.
With Edocsmart, businesses can extract information from invoices, review the accounting details and download a BUSY-compatible Excel file. Once the appropriate import template is configured in BUSY, the verified file can be imported into the accounting system.
Instead of typing every invoice field manually, the accountant can focus on checking the extracted data and confirming the final accounting entries.
What Does Importing an Invoice into BUSY Mean?
Importing an invoice into BUSY means transferring structured invoice information into BUSY accounting software through a supported import process.
The information may include invoice number, date, party name, item code, quantity, rate, taxable value, GST and total amount.
When the original invoice is a PDF or image, its information first needs to be extracted and organized into a format suitable for the accounting system.
Edocsmart helps with this preparation by converting invoice information into structured data that can be reviewed and exported to Excel.
The Excel file can then be imported into BUSY using a properly configured template.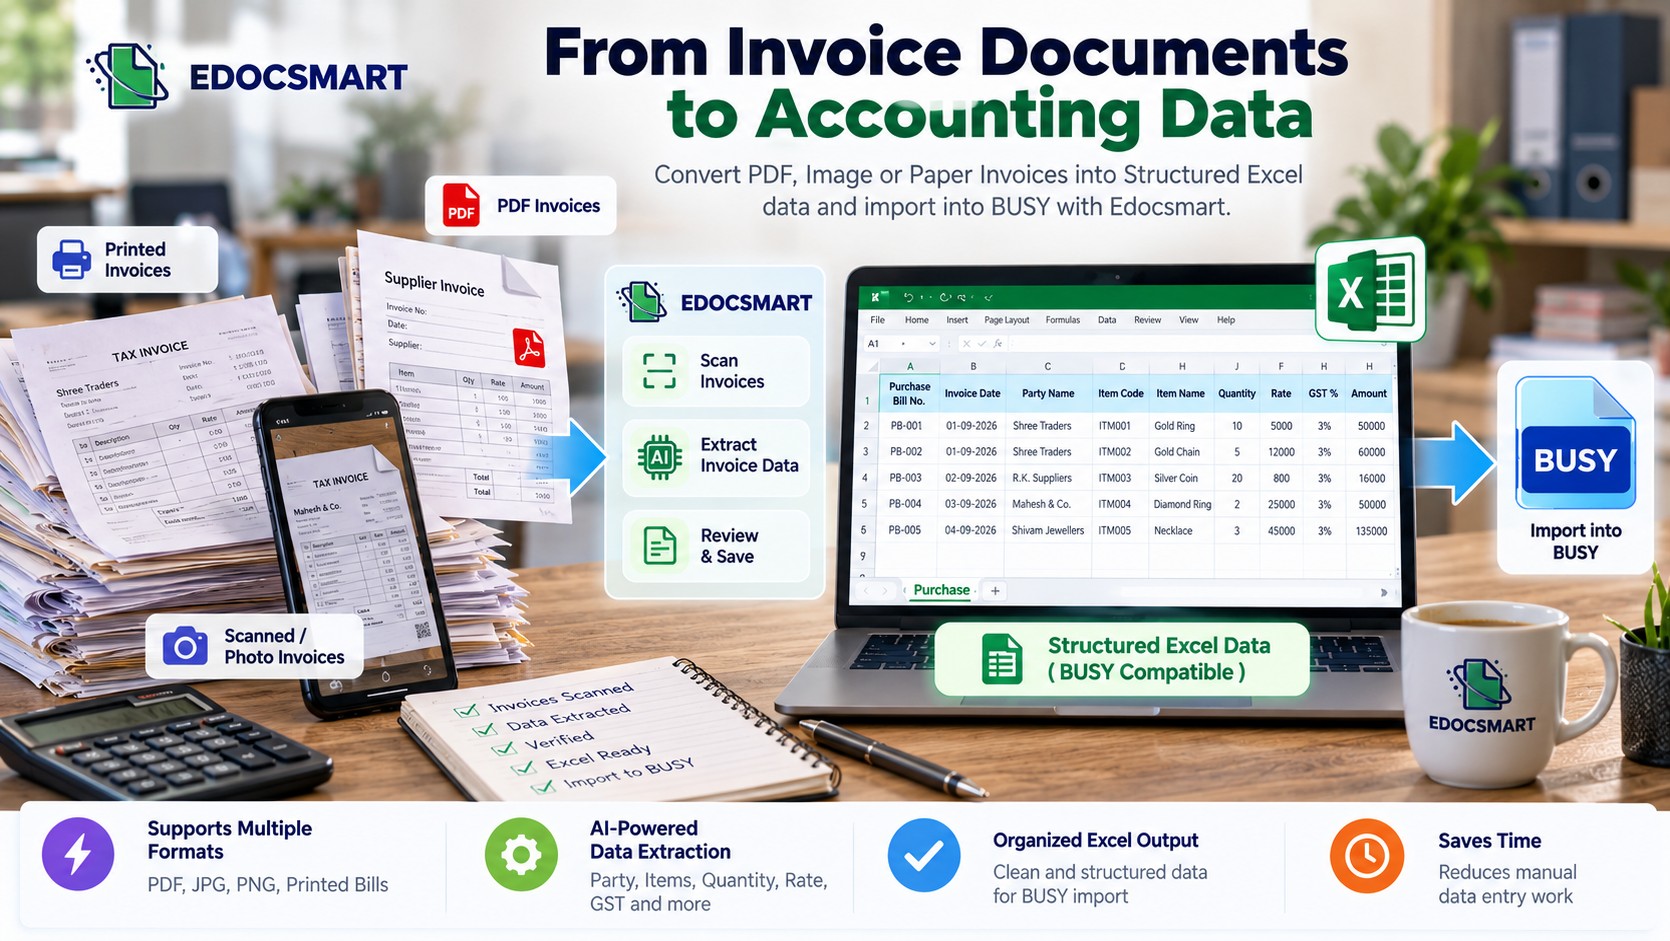 How to Import Invoice into BUSY Using Edocsmart
Step 1: Sign In to Edocsmart
Open your browser and visit Edocsmart.
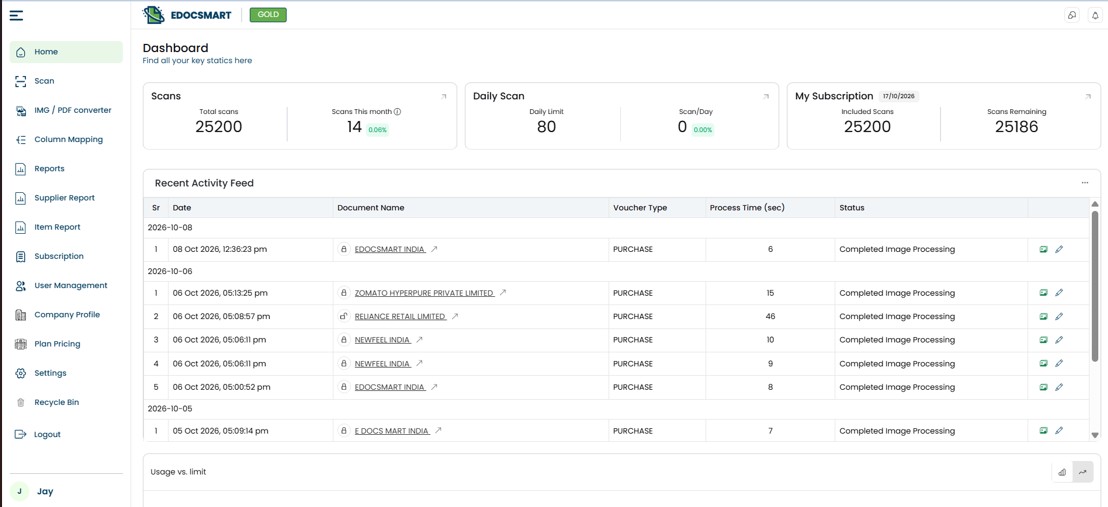
Click Sign In and enter your account credentials. After logging in, you will reach the Edocsmart dashboard.
From the left sidebar, select Scan to access the invoice-processing section.
Step 2: Upload Your Invoice
On the Scans page, click the green Scan button.
Upload the invoice document you want to process. Depending on the supported workflow, this may be a scanned invoice, invoice photograph or PDF document.
For a purchase invoice, use the purchase-processing workflow. Sales invoices should be handled through the corresponding sales workflow rather than treating every document as a purchase bill.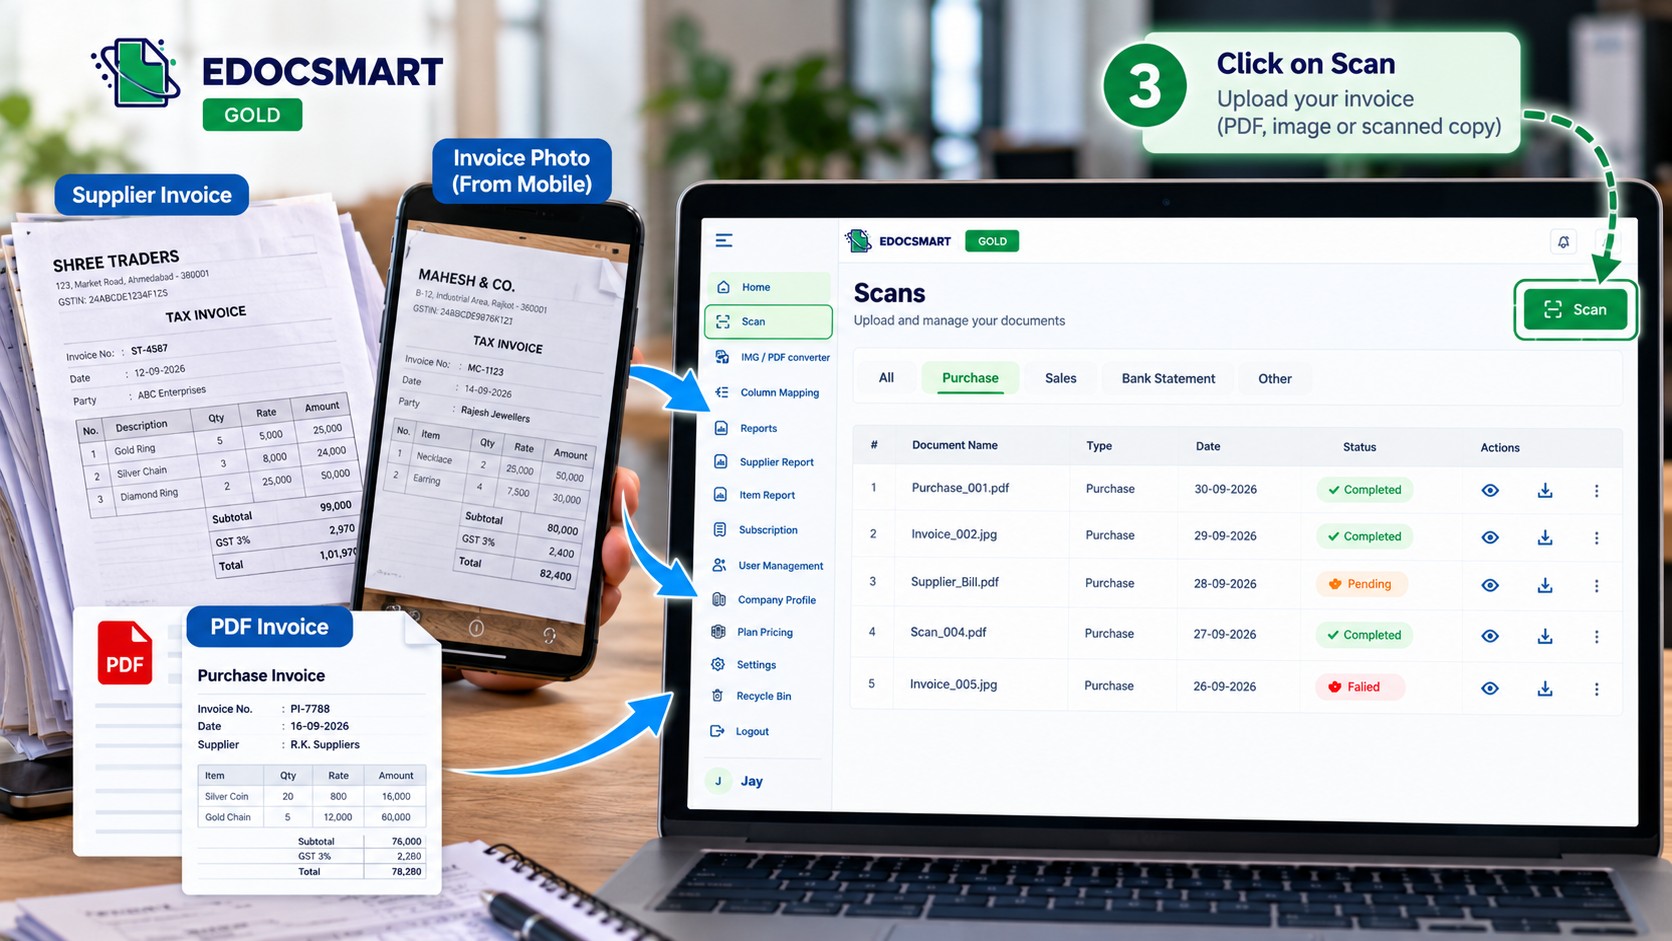
Step 3: Extract Invoice Information Automatically
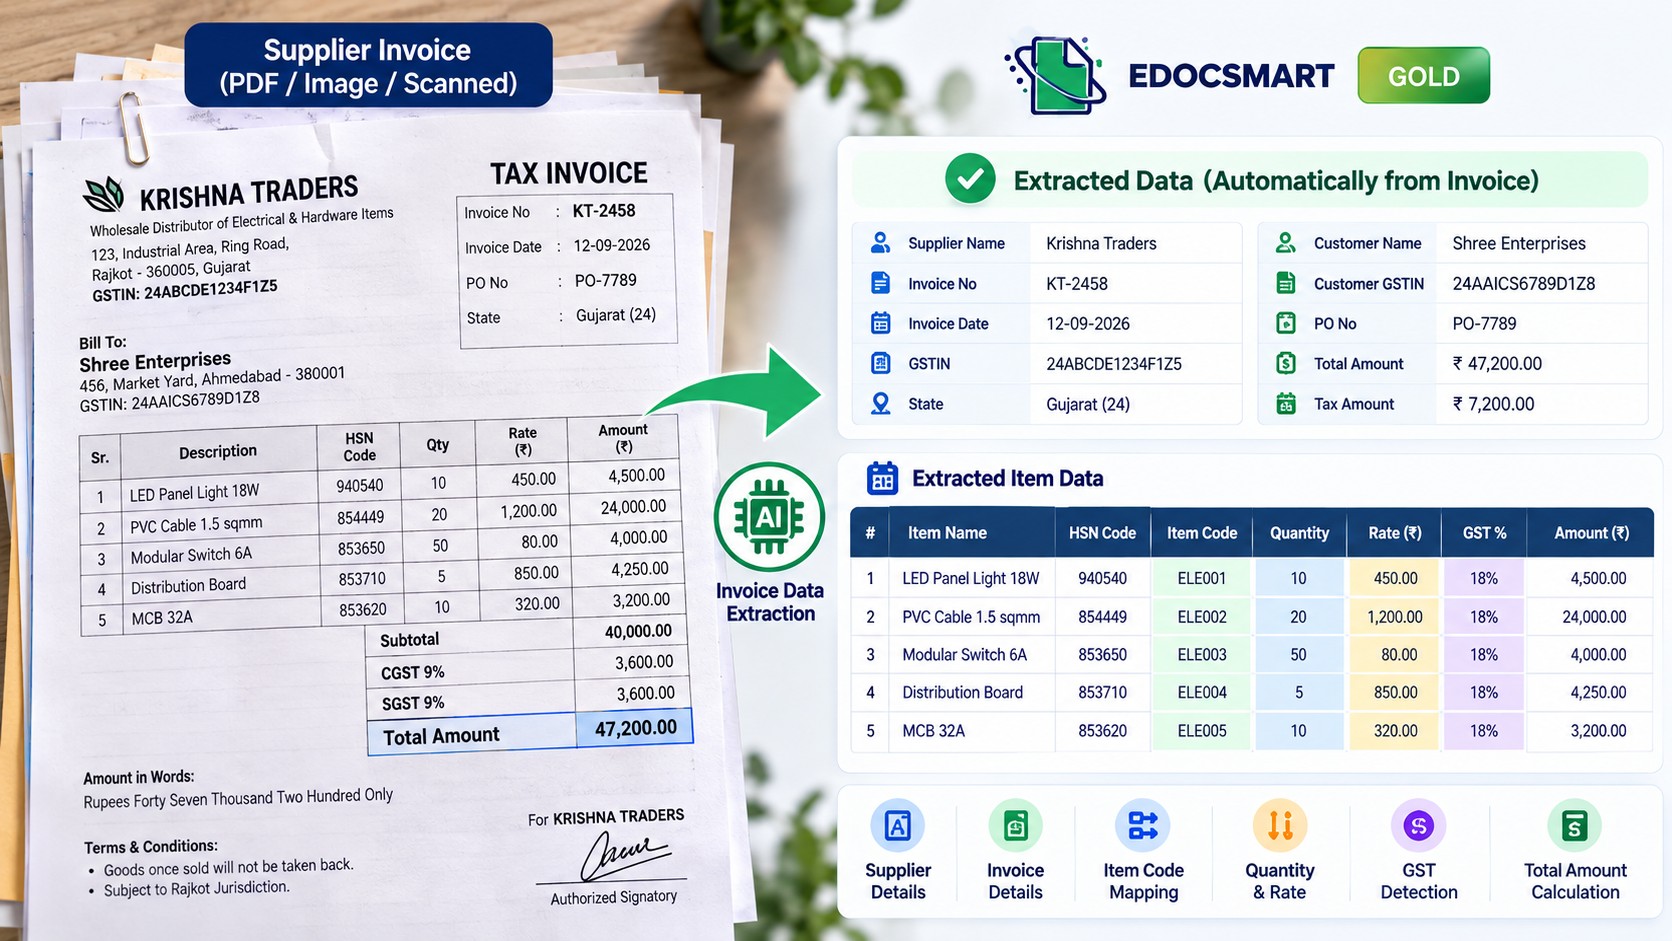
After uploading the document, Edocsmart processes the invoice and organizes the available information into accounting fields.
Depending on the invoice layout and document quality, the extracted information can include:
Party name and invoice number
Invoice date and purchase bill reference
Item code and item description
Quantity, unit price and taxable value
GST details, discounts and total amount
This reduces the need to copy each field manually from the original invoice.
Step 4: Review the Extracted Invoice Data
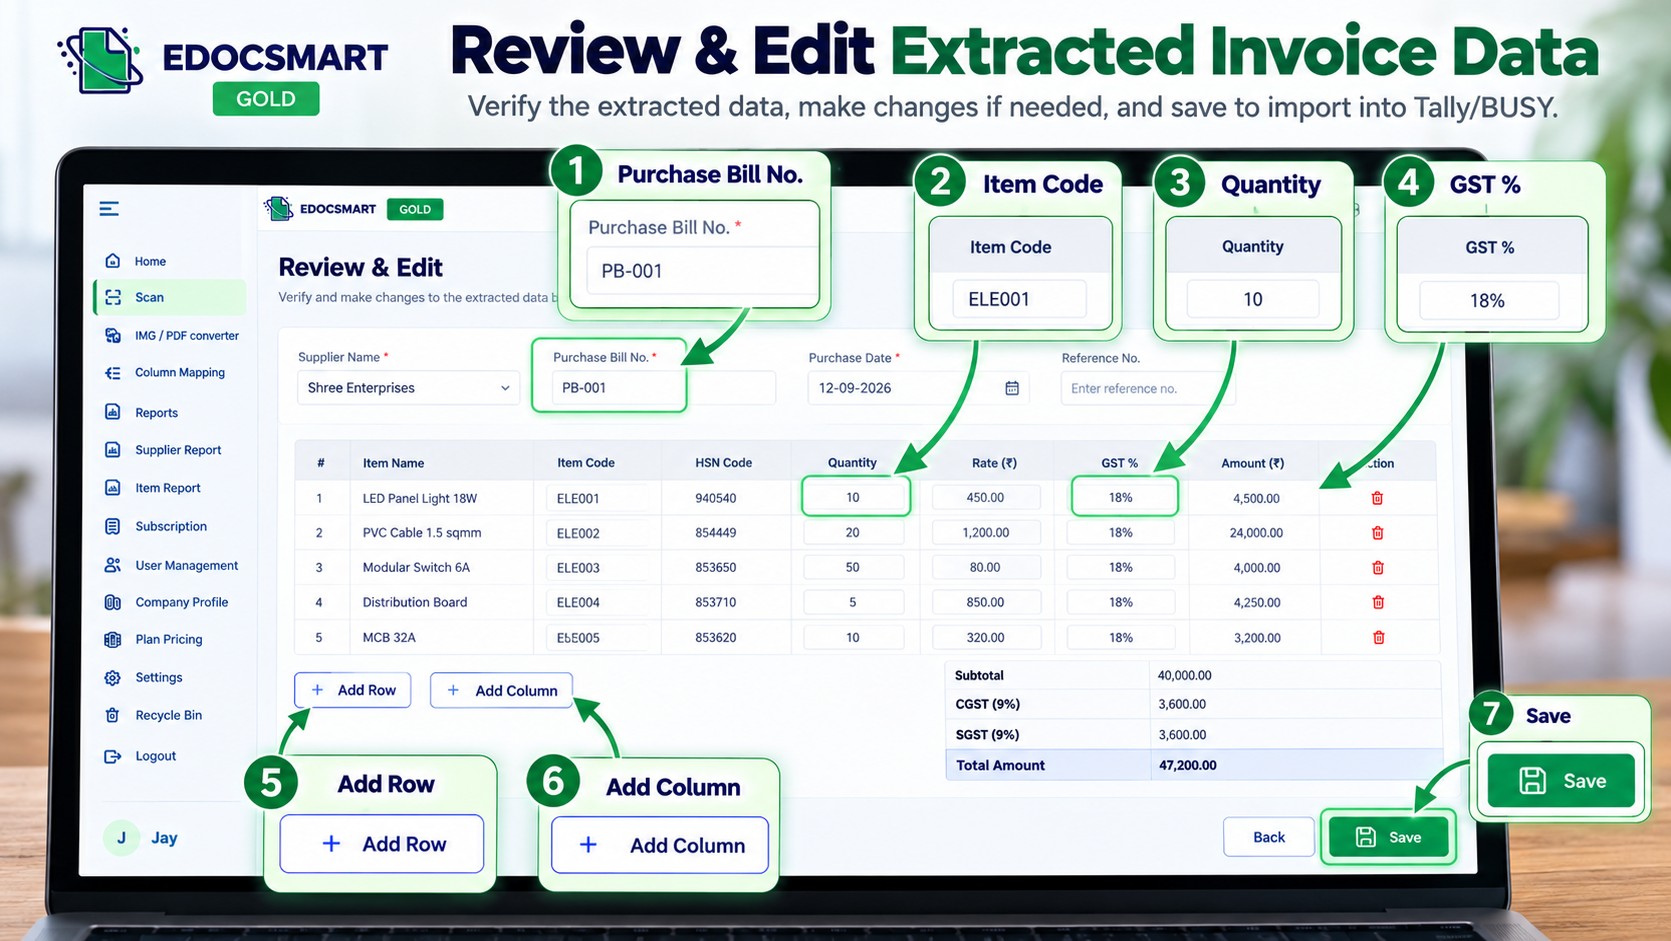
Once processing is complete, open the invoice details and carefully review the extracted information.
Start with the party name, invoice number and invoice date. Then verify the total amount, GST values, discounts and other charges.
Pay special attention to the item table. An incorrect item code, quantity or rate can affect the accounting entry even when the invoice total appears correct.
Edocsmart's editable review screen also provides options such as Add Column and Add Row when additional information is required.
Correct any mismatched values before saving the document.
Step 5: Save the Verified Invoice
After checking the invoice details, click Save.
The Edocsmart workflow shows the completed Upload Invoice and Review Data stages, followed by the Save stage.
From the save confirmation screen, you can access the processed document and its download option.
Step 6: Download the BUSY-Compatible Excel File
Click the download icon to open the export-format selection.
Edocsmart provides two options in the reference workflow:
Busy ItemWise and Busy Local / Central.
Choose the format that matches your intended BUSY import configuration and download the Excel file.
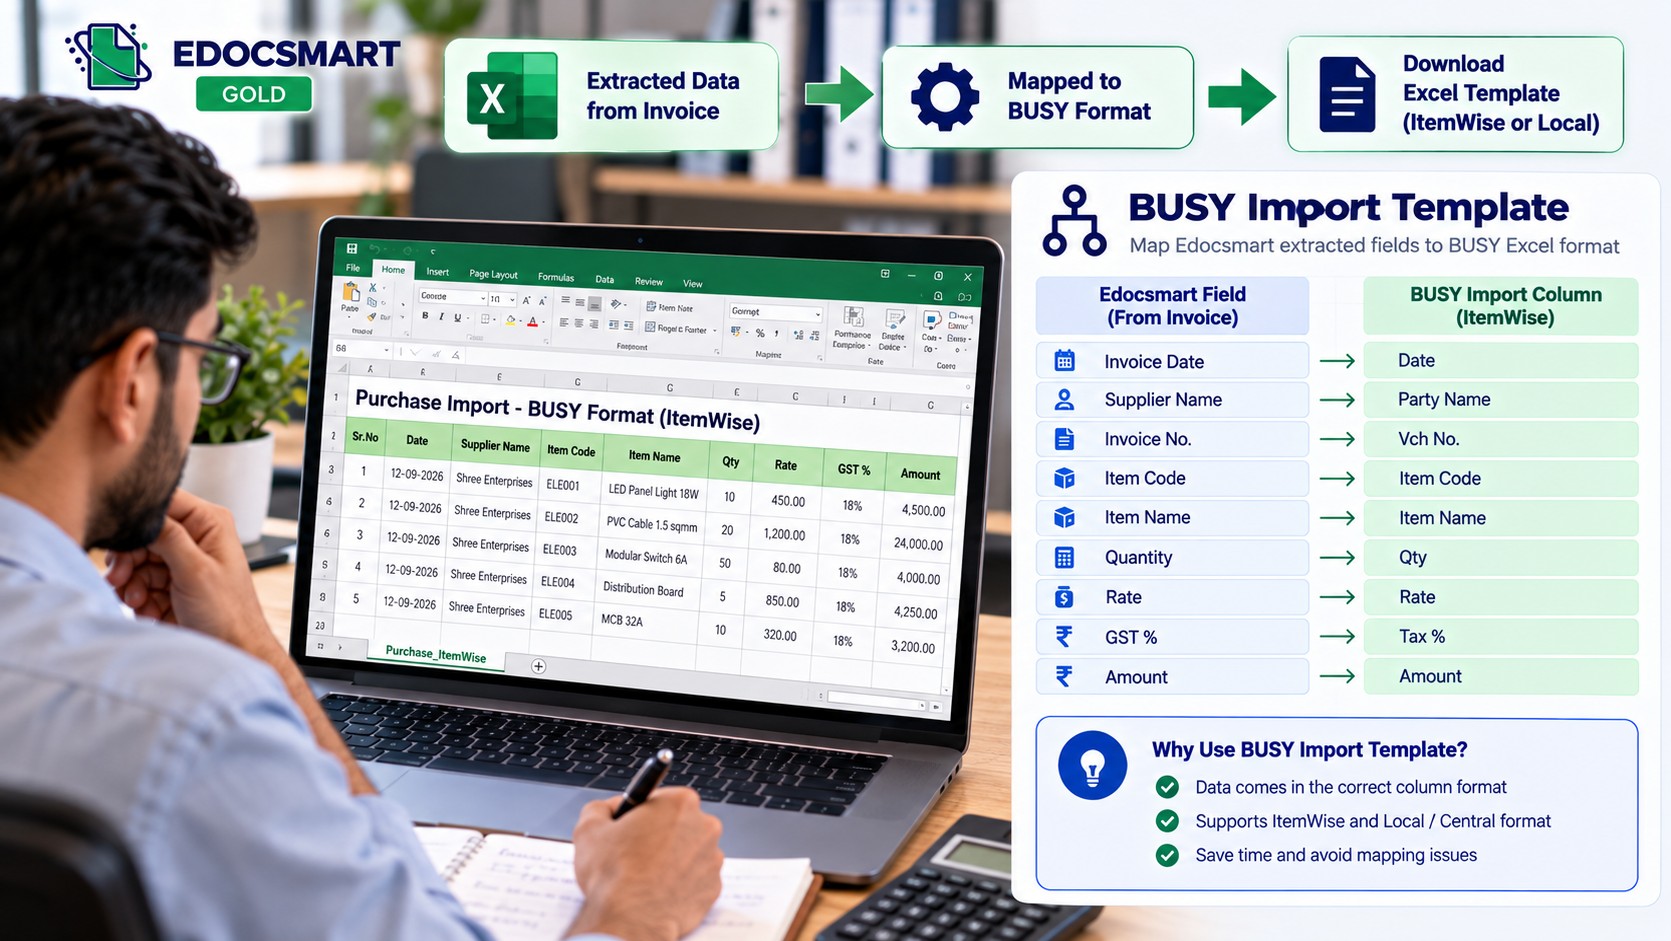
The downloaded spreadsheet contains the structured invoice information prepared for the selected export format.
Step 7: Configure the Import Template in BUSY
Before importing the Excel file, make sure the corresponding import format or template is configured in BUSY.
The Excel columns must match the fields expected by the selected BUSY import configuration.
For example, Purchase Bill No. should correspond to the relevant invoice-reference field, while Item Code, Quantity and Rate should match their intended accounting fields.
This mapping generally needs to be configured for each consistent file layout or import format, rather than recreated for every invoice.
However, changes to the Excel structure or BUSY configuration may require the mapping to be reviewed.
Step 8: Import the Excel File into BUSY
Open BUSY accounting software and select the relevant company.
Use the appropriate Excel import facility for the voucher type and BUSY version you are using. Select the configured template and the Excel file downloaded from Edocsmart.
Check the field assignments and complete the import using the available options.
The exact menu names and steps may differ depending on your BUSY edition and configuration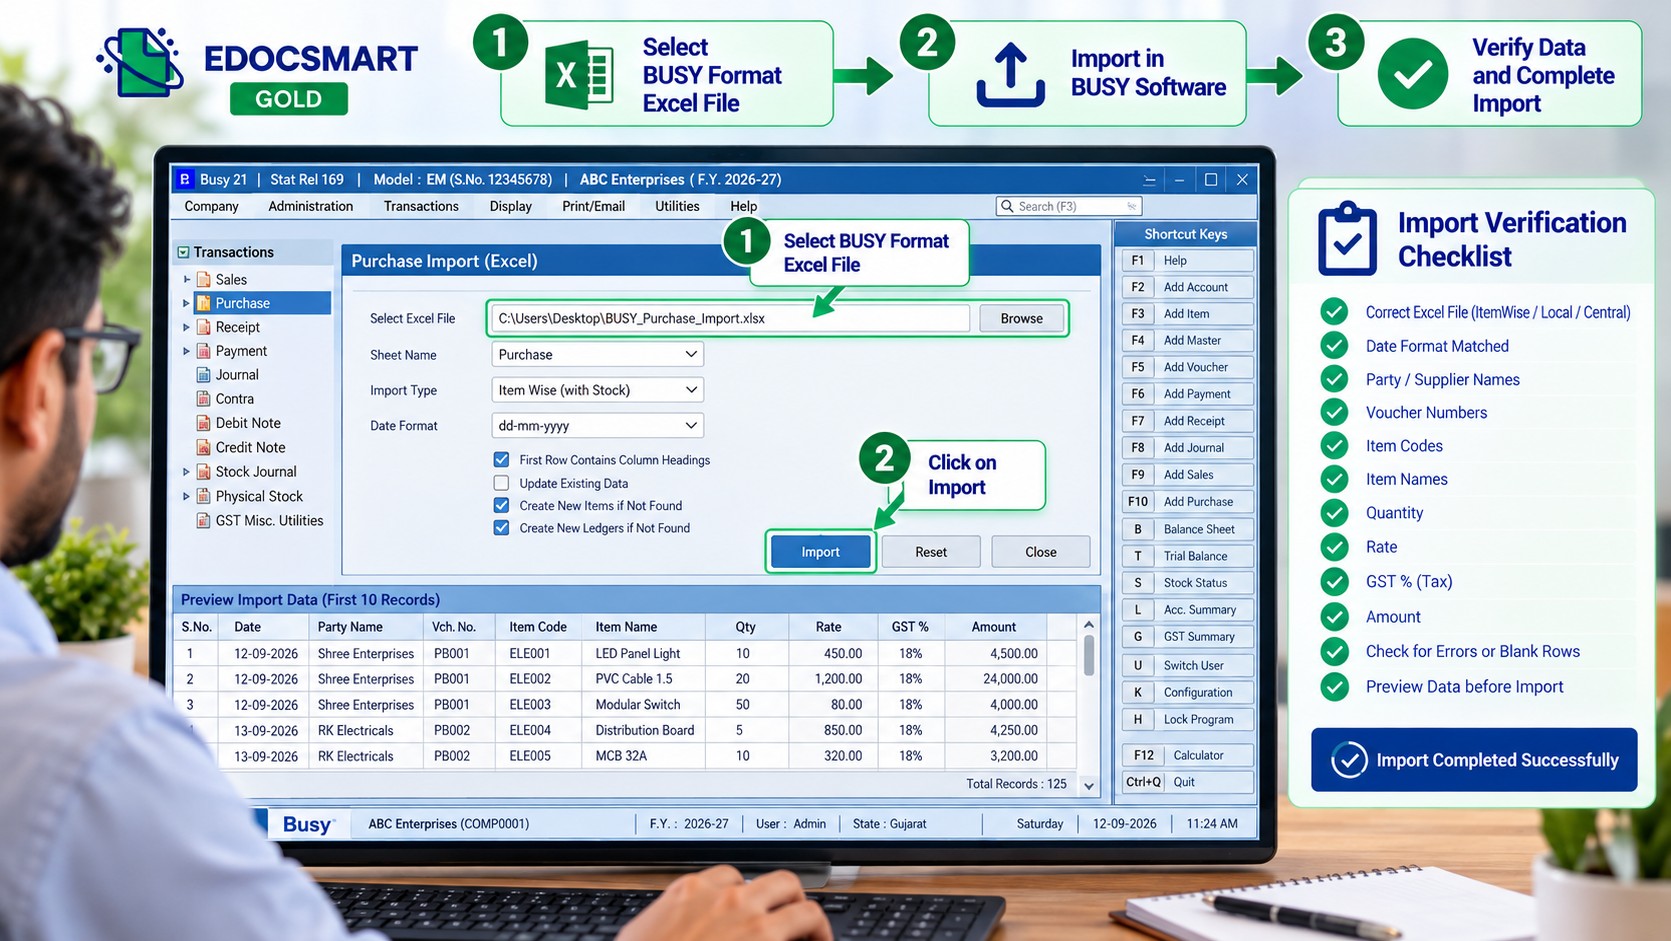
Step 9: Verify the Imported Invoice
After importing, open the corresponding accounting entry in BUSY.
Compare the entry with the original invoice, particularly the party ledger, invoice reference, stock items, quantities, GST values and total amount.
This final verification helps confirm that the extracted and imported information has been assigned to the intended accounting fields.
Benefits of Using Edocsmart for Invoice Imports
The main advantage of an invoice-processing workflow is reducing repetitive manual data entry.
Businesses can prepare structured invoice information from different document formats, review the data before export and use a consistent Excel layout for their BUSY import process.
Edocsmart also supports workflows involving bulk invoice processing and customized data requirements, subject to the available configuration.
For businesses managing frequent supplier invoices, this can make the accounting preparation process more organized and easier to review.
Manual Invoice Entry vs Invoice Import into BUSY
| Manual invoice entry | Edocsmart-assisted invoice import |
|---|---|
| Enter invoice details individually | Extract invoice fields from uploaded documents |
| Repeatedly type item information | Review structured item information |
| Manually copy GST values | Verify extracted GST values |
| Handle different invoice layouts individually | Prepare data in a selected Excel export format |
| Enter each accounting field manually | Import a configured Excel file into BUSY |
| Check entries after manual posting | Review before export and verify after import |
Frequently Asked Questions
1. How do I import an invoice into BUSY?
You can import invoice information into BUSY by preparing the data in a supported Excel format, configuring the corresponding BUSY import template and importing the file. Edocsmart can help extract invoice details from documents and export the reviewed information into a BUSY-compatible Excel format.
2. Can I import a PDF invoice directly into BUSY?
A PDF invoice generally needs to be converted into structured accounting data before using an Excel-based import workflow. Edocsmart can extract and organize the invoice information, which you can review and download in a suitable format.
3. Can I import purchase and sales invoices into BUSY?
BUSY supports accounting workflows for purchase and sales transactions. However, the import format and voucher configuration must match the transaction type. The Edocsmart screenshots provided here demonstrate the purchase-invoice extraction and export workflow.
4. Do I need to map Excel columns every time?
Not necessarily. A configured import template can often be reused when the Excel file structure and required BUSY fields remain consistent. If the column layout changes, the mapping may need to be updated.
5. Can I import invoice item details into BUSY?
Yes, where supported by the selected import format and configuration. Item codes, descriptions, quantities, rates and tax-related information should be reviewed before import to ensure they match the intended accounting records.
6. What should I check before importing an invoice?
Verify the invoice number, date, party name, item codes, quantities, rates, GST values and totals. Also confirm that the BUSY import template matches the downloaded Excel format.
7. What happens if an invoice contains incorrect extracted information?
You should correct the information in the Edocsmart review stage before saving and exporting the document. If an error is discovered after import, review the affected entry in BUSY and follow the appropriate correction procedure.
Conclusion
Importing invoices into BUSY becomes easier when the original documents are converted into organized, verified accounting data before import.
With Edocsmart, businesses can upload invoice documents, extract relevant information, review item and GST details, and download a BUSY-compatible Excel file. After configuring the appropriate import template, the file can be imported into BUSY and checked against the original invoice.
The result is a more structured invoice-processing workflow that reduces repetitive typing while keeping accounting verification in the hands of the user.